First setup
Intro#
In this tutorial, we will walk you through the following steps:
- Install the ReachView 3 app
- Connect to Reach RS/RS+
- Perform firmware update
- Set up base and rover connection
To do that, you will need Reach RS/RS+ itself, a Wi-Fi network with the Internet access and a smartphone.
note
If you encounter any issues performing these steps, we will be happy to help at our community forum.
Text guide#
Installing ReachView 3#
For managing Reach RS/RS+, we recommend using the ReachView 3 app for iOS or Android. Get it from the App Store or Google Play before updating.
| Google Play | App Store |
|---|---|
| Android ReachView 3 app [60 MB] | iOS ReachView 3 app [74.7 MB] |
Powering up#
To power up your Reach, follow the steps below:
- Hold the power button for 3 seconds to turn the unit on
- Wait for about 30 seconds until the blue LED stops blinking
Reach RS/RS+ is now broadcasting Wi-Fi.
tip
You can read more about power supply in this guide.
Connecting to Reach RS/RS+#
Using Reach with Android device
Turn off the mobile data on your device before connecting to Reach's hotspot.
To connect to your Reach, follow the steps below:
- Open a list of Wi-Fi networks on your smartphone/PC
- Connect to a network named reach:xx:xx
- Type network password: emlidreach
Once you successfully connected to Reach's hotspot, you can go to ReachView 3 and set up connection to your Wi-Fi network.
Setting up Wi-Fi#
note
Make sure that your Wi-Fi network uses 2.4 GHz band.
To connect Reach to your Wi-Fi network, follow the steps below:
- Open ReachView 3 and choose your Reach from the list
- Tap the Plus button and enter your Wi-Fi network name, security type, and password
- Tap the Save button
- Tap on the added network and then Connect
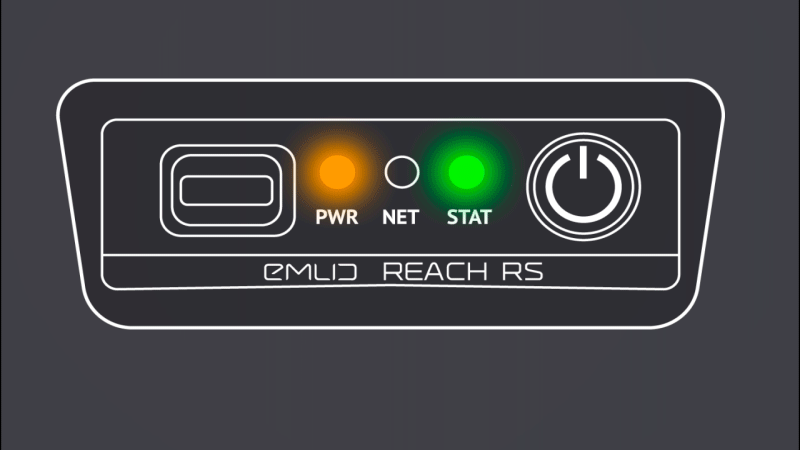
Reach RS/RS+ will stop broadcasting Wi-Fi and connect to your network. The Network LED will blink rapidly while scanning for networks. Once Reach connects to Wi-Fi, the LED will start blinking slowly.
When the Wi-FI connection is established, you can connect to your unit using ReachView 3:
- Open the app
- Choose your unit from the list of available devices
note
If there is only one receiver, the app will automatically try to connect to this Reach.
tip
If your device did not connect to the Wi-Fi network, it will switch back to hotspot mode. In that case, repeat the steps and double check your network name and password.
Updating ReachView 3#
After connecting to Reach RS/RS+, you will see Updater again. Wait until it checks for the latest updates. If there is an update, follow the steps below:
- Press the Update ReachView button and wait. This process will take a few minutes
- Tap Reboot and go to the app!
- Wait for the blue LED to stop blinking, showing that Reach RS/RS+ has joined your Wi-Fi network again
- Close the Updater page
- Tap the Receivers tab to go back to the list of available devices
- Refresh the list of available devices
- Connect to your receiver
note
If there is only one receiver, the app will automatically try to connect to this Reach.
Your Reach RS/RS+ is ready for work. Do the same with all other units.
Now you can set up base and rover connection following the instruction from our guide.