Base and Rover setup
Video guide#
This tutorial will show how to set up two Reach RS/RS+ units as a rover and a base and how to make them work over LoRa radio in RTK mode.
For setting NTRIP base corrections, follow the steps from Working with NTRIP service guide.
Text guide#
Renaming Reach devices#
By default, every Reach RS/RS+ has the same name, and the first thing we will do is renaming them so it is easier to distinguish the base and the rover in the field.
How to define Reach RS/RS+?
There is an easy way to understand which unit you are connected to. Just open the menu and tap the lamp-shaped button. All LEDs will start to blink.
Connect to Reach RS/RS+ you want to use as a base
Go to Settings, click on the General tab, and change the name to reach-base. This name will also be used as a Wi-Fi network label when Reach is in hotspot mode
Press Save
tip
Use a special sticker from the package to mark the unit.
Do the same with the second Reach RS/RS+. However, use reach-rover name instead of reach-base.
Setting up base station#
Now we will configure RTK settings and communication between the base and the rover. Let’s start with the base.
Connect to the base unit
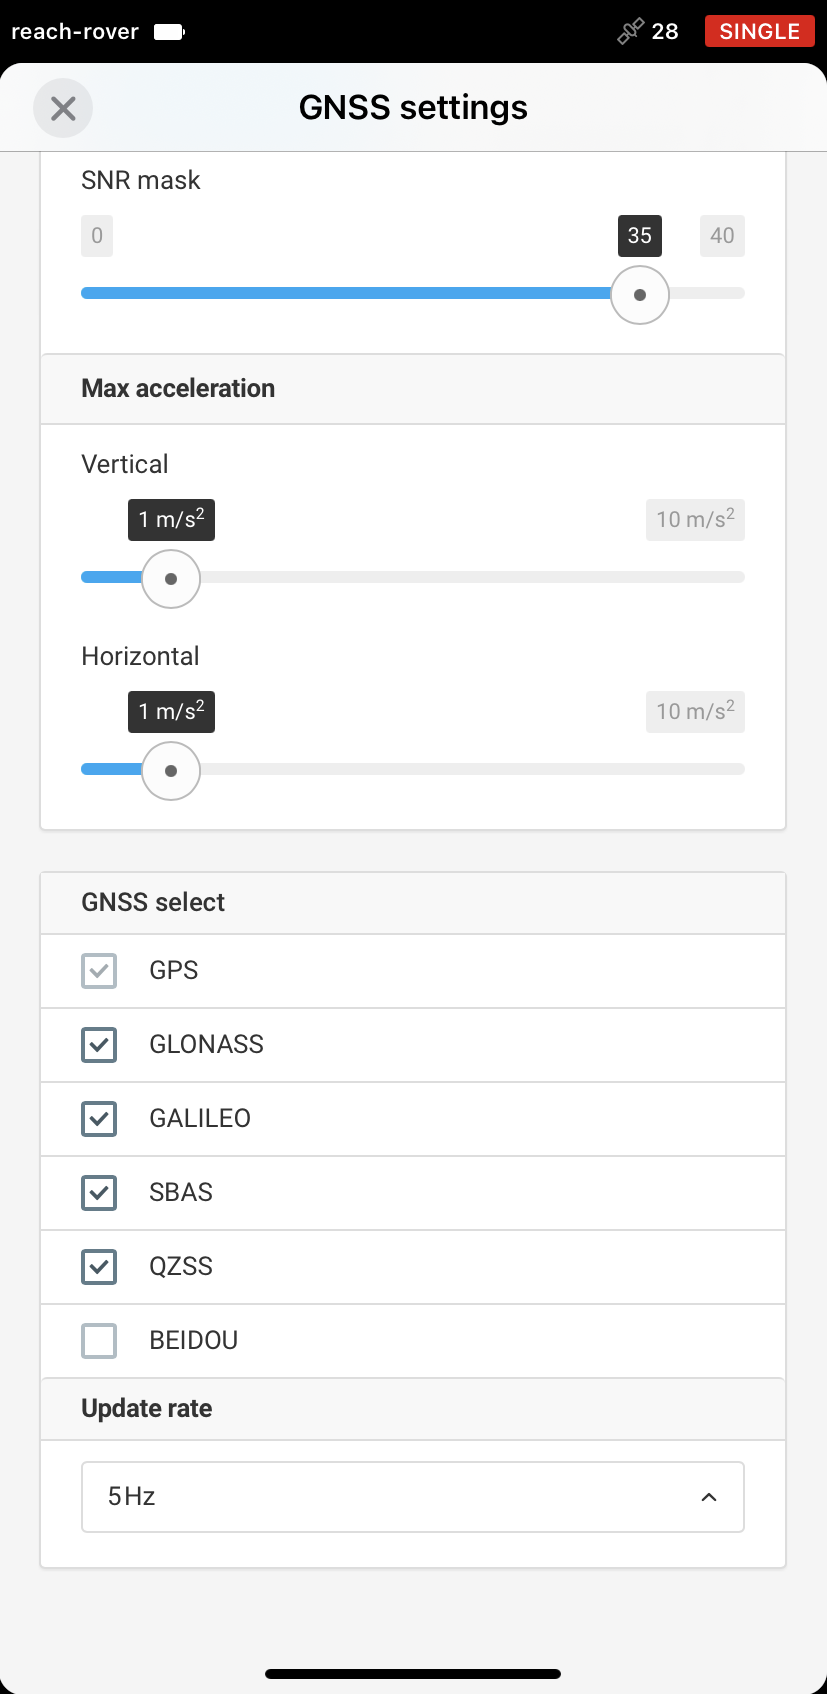
Open the GNSS Settings tab and pick each of the satellite systems
note
Choose which one to use depending on your location. While GLONASS covers most of the world, BeiDou might be more efficient in the Asia-Pacific region.
- Set the update rate at 1 Hz

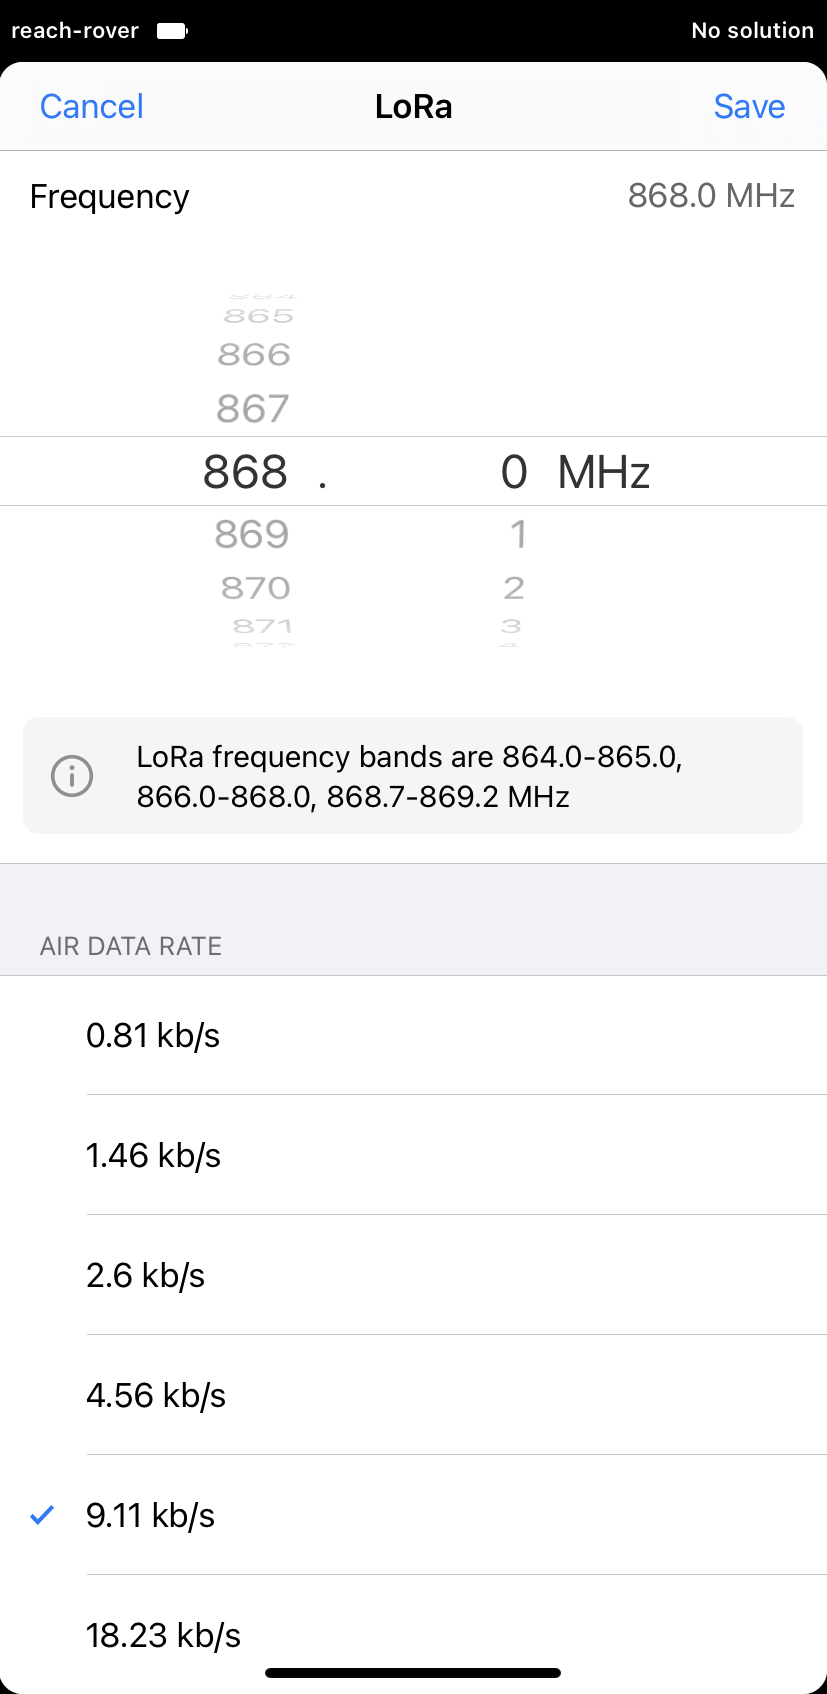
Now we will set up LoRa radio on Reach RS/RS+ base to broadcast RTK corrections.
- Go to the Correction output section and select LoRa
- Set the output power at 20 dBm and air rate at 9.11 kb/s
danger
Make sure to select appropriate output power and frequency according to your local regulations. In case there are restrictions, frequency band limitations will be applied automatically.

Go to the Base mode tab
In the list of RTCM3 messages, select to output GPS L1 observations at 1 Hz, GLONASS L1 observations at 0.5 Hz, Galileo MSM7 observations at 0.5 Hz, SBAS observations at 0,5 Hz, QZSS at 1 Hz, Beidou MSM7 observations at 0.5 Hz, and ARP station coordinates at 0.1 Hz
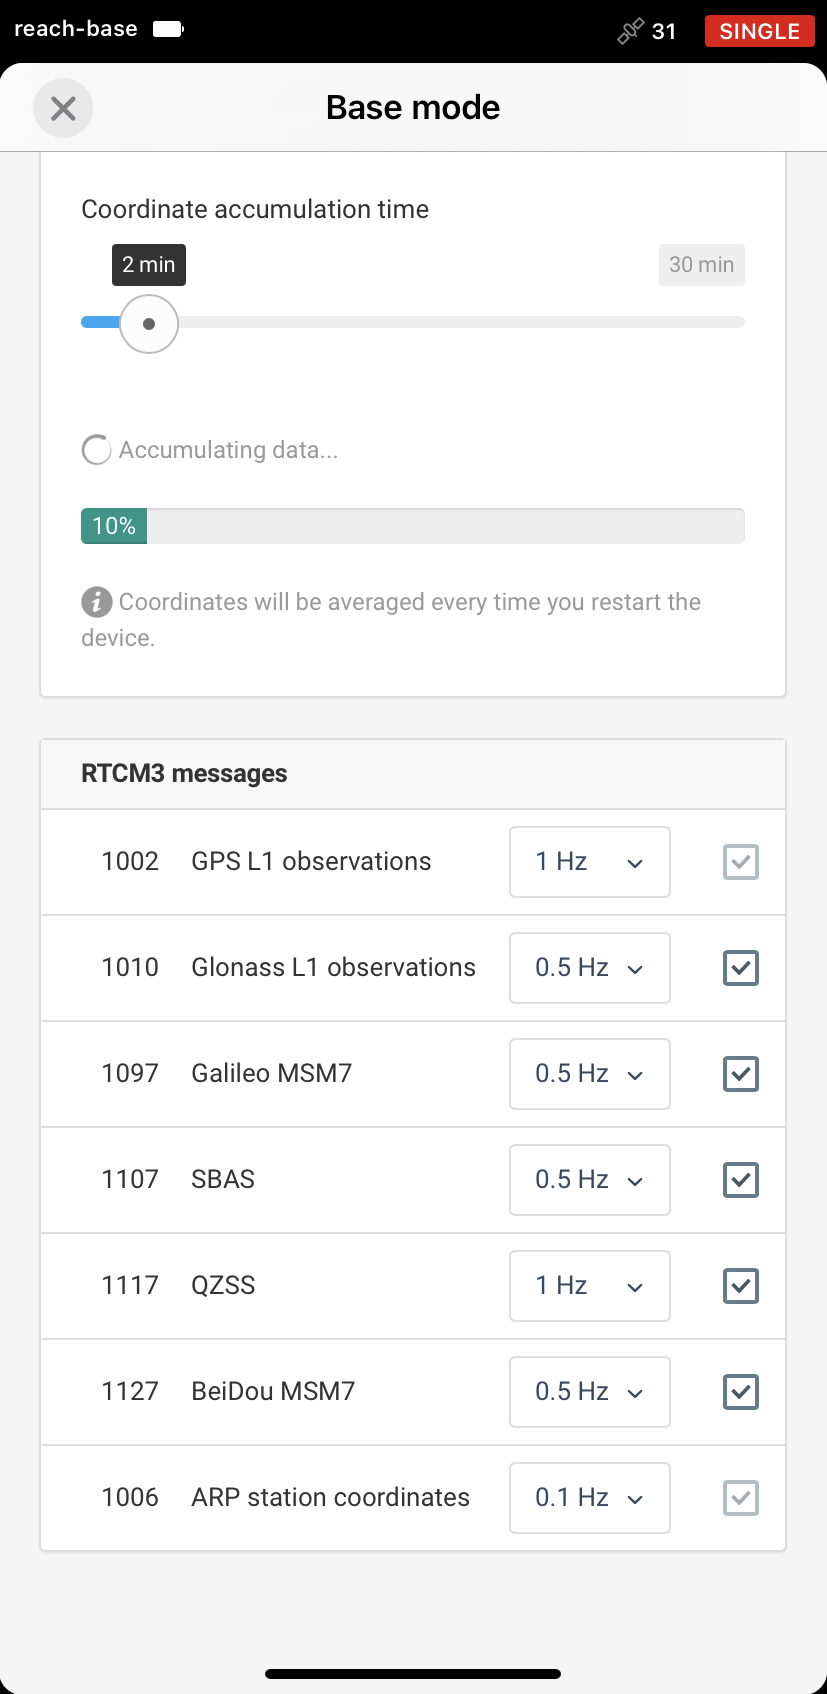
- Apply settings and wait until base averages its position in the Base coordinates box
Setting up rover#
Connect to the rover unit
Go to the GNSS settings tab
Set the positioning mode to Kinematic, GPS Ambiguity resolution mode to Fix-and-hold and GLONASS Ambiguity resolution mode to ON
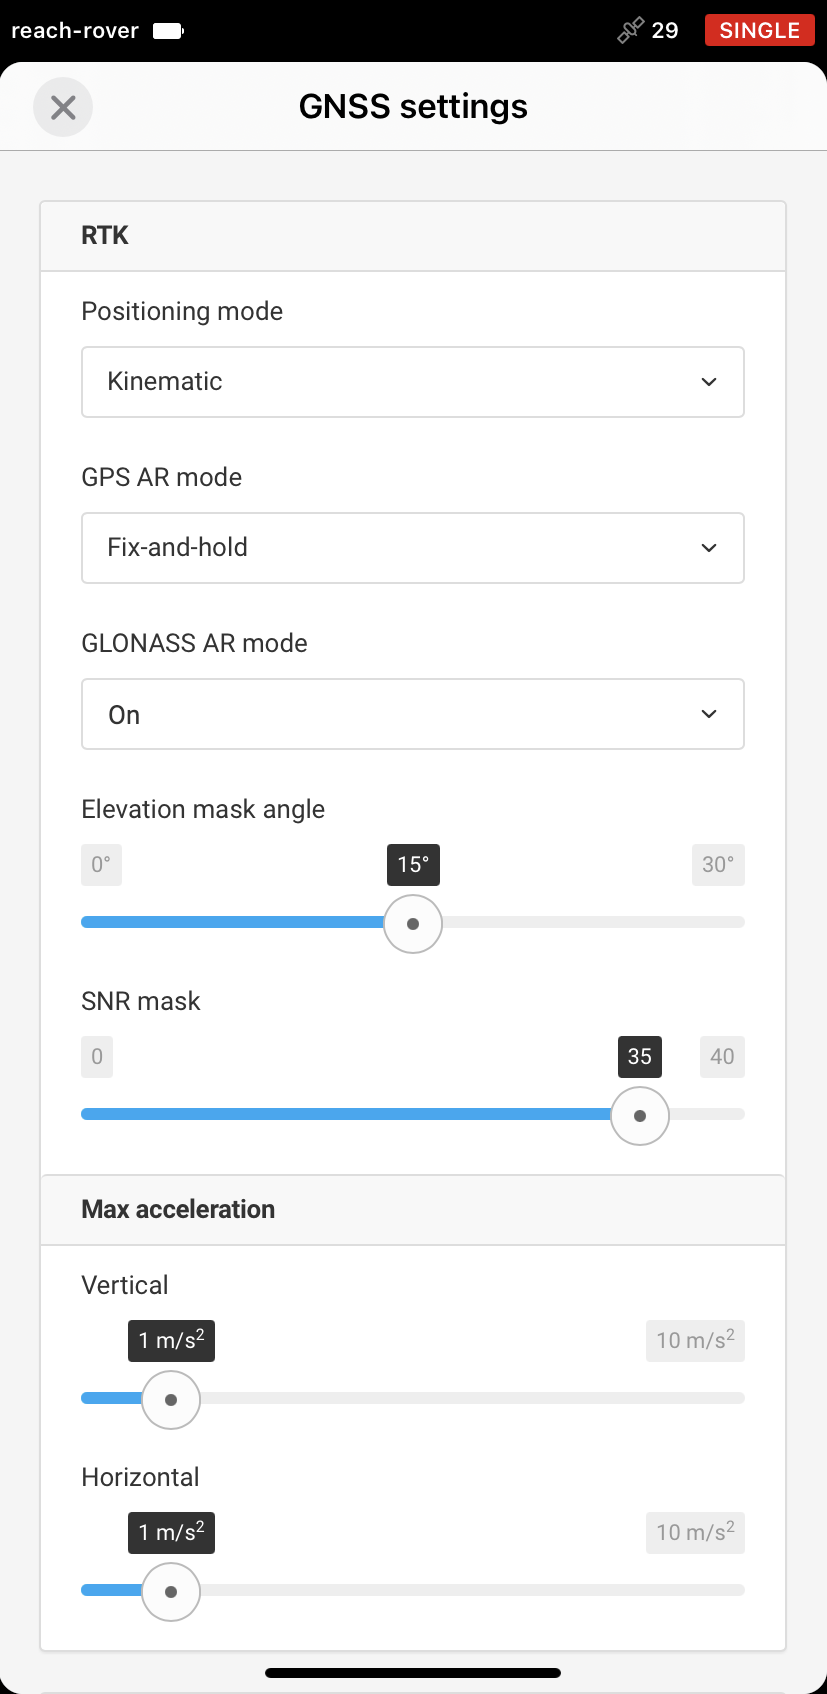
- Select the same GNSS systems as for the base, set 5 Hz update rate and press Apply
Now we will configure LoRa radio on the rover unit to receive the corrections.
Go to Correction input tab and pick LoRa
Frequency and air rate settings must match what was configured on the base
Apply changes and you will see rover is connected to the base
tip
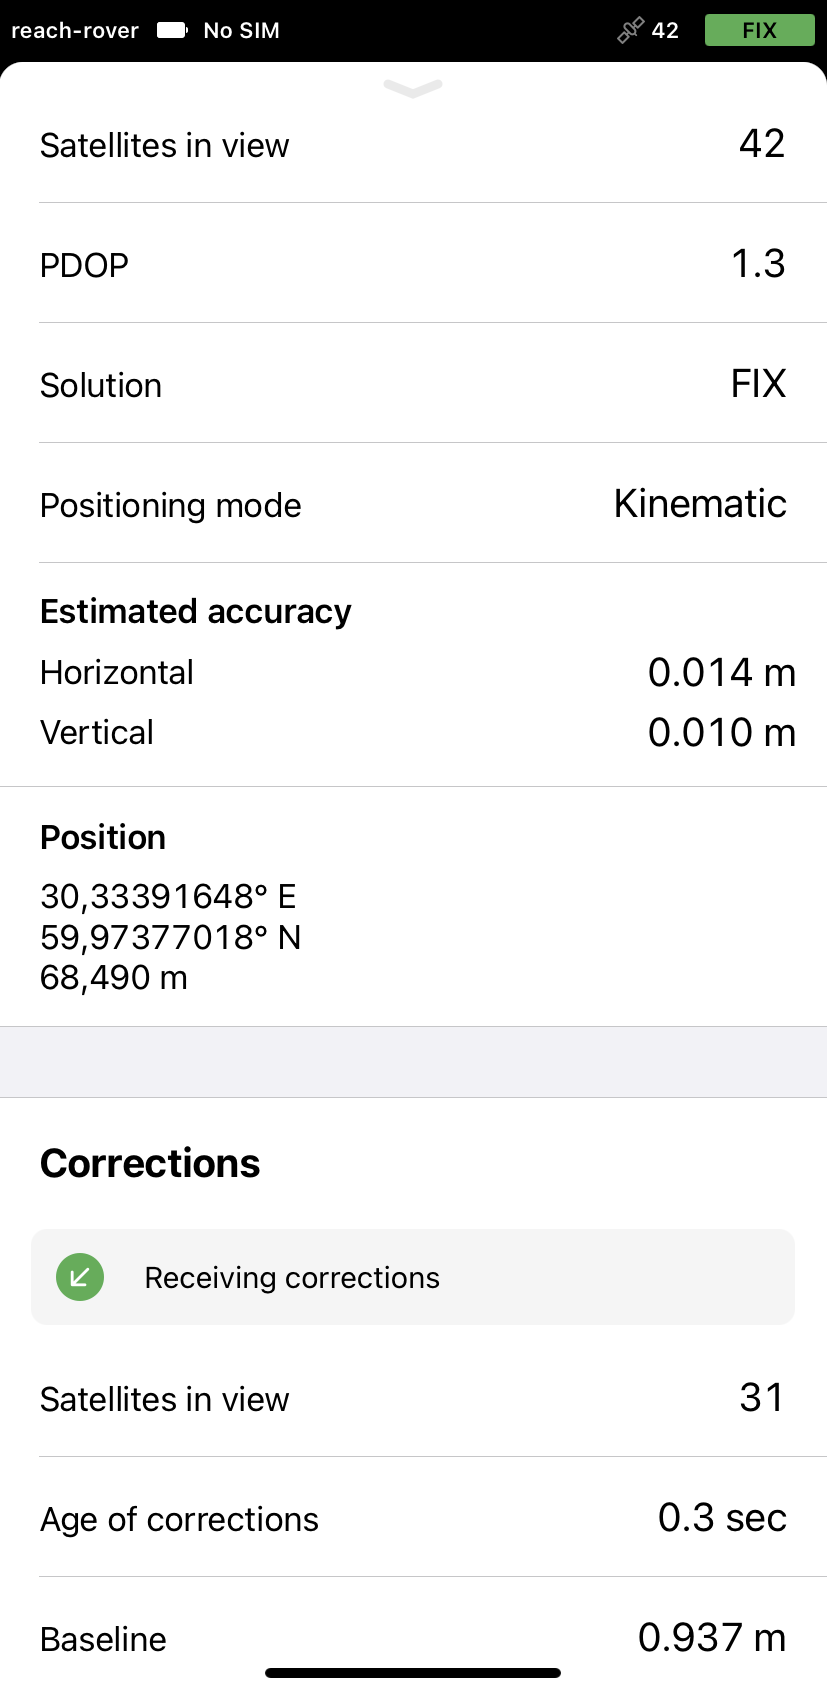
To make sure that corrections are passing from the base to the rover, you can put both receivers by the window for a few minutes to provide the sky visibility. Go to the Status tab on the rover unit and scroll down to the Corrections section. Make sure that it is receiving corrections.
Placing Reach RS/RS+ unit#
Once the units are configured, we can move to the field. For the field works, you will need a tripod and a survey pole.
Mount Reach RS/RS+ base and accurately level the tripod. Put the rover on the pole and attach the LoRa antennas. Turn on the devices.
danger
There should be no obstacles near the antenna that could block the sky view higher than 30 degrees above the horizon. Do not test the device indoors or near buildings, do not cover the sky view for the antennas with laptops, cars or yourself. RTK requires good satellite visibility and reception.
A guide on how to properly place the antennas is available in the Reach RS/RS+ placement section.
Let’s set up the base station.
Connect to the base
Go to Base mode tab
In the Base coordinates section select Average single and set averaging time. Do not move the base while Reach is accumulating data
Once the position is calculated, press Apply
Go to the Status tab on the base station to assure ReachView 3 shows plenty of available satellites
Connect to the rover and check the Status tab. If everything is configured correctly, you will see the Receiving corrections notification.
Viewing results#
You can see the current solution status in the top right corner of the app.
Single means that the rover has found a solution relying on its own receiver and base corrections are not applied. Precision in standalone mode is usually meter-level
Float means that base corrections are now taken into consideration
Fix status means all ambiguities are resolved and RTK solution is centimeter-level accurate
After a short period of time, the rover gets a fixed solution. In good environments, it will take a few seconds to get a fixed solution. In tough conditions, it may take a little longer. Once rover gets fix status, we are all set for work.
You can also find the current solution status as well as your position in real time on the Status screen.
note
For more information on placing the receivers, please consult the First setup guide.